Must-Know Moves If You’re A Barre Beginner

March 11, 2021

If you’ve recently tried a barre class for the first time, you might be wondering about some of the terms you’ve heard, like “first position” or “wide second”, or want to know the proper technique for some of the exercises. If that’s the case, I’ve got you! If you’re a barre beginner, understanding the basics will help you to get the most out of this growing training style.
Barre is a high-energy, hybrid training style that combines elements of ballet and Pilates. My barre classes are a great option for all experience levels, including barre beginners, and incorporate low-impact strength and high-intensity exercises to build muscle. This is done through high repetitions, using small weights to get the muscles to the point of fatigue — helping to improve muscular endurance, balance, stabilization, and flexibility.
Barre with Britany is my 12-week program, but I also have on-demand classes that will complement any fitness routine! My program will help change your body, your mind, your confidence, AND your capability — try it for yourself if you don’t believe me!
But first — these are some of my best tips to help get you started and take your barre journey from strength to strength.
3 barre positions you need to know
While I include common exercises like squats and lunges in Barre with Britany, there are a few foot positions and moves you’ll need to know to get the most out of the program.
Barre’s foot positions originally come from ballet exercises. To help you create a stable base, always remember to keep your feet splayed (toes spread out and pressed into the floor) — particularly during exercises on your tippy-toes.
For your at-home barre practice, you’ll need something to support you for many of the exercises, just as you would use a barre in a dance studio. You can use a high-backed chair, and it should reach just above your belly button — aim for about 36-40 inches (91-102cm), depending on your height. If you don’t have a chair, try using a countertop, table, or couch.
Here’s how to correctly perform moves in your barre workout.
First position
You’ll mostly be on your tippy-toes, unless I cue you in class to have flat feet. To help you remember first position, think about your feet forming the shape of a slice of pizza!
With your heels together, hold on to your support and move your toes apart at about 45 degrees in a “V” shape — you should be able to fit your fist in this space. Ensure your legs aren’t turned all the way out, as this will put a lot of pressure on your knees.
Lift your heels, keeping them together and knees slightly bent. Your shoulders should be stacked over your hips, core engaged and hips slightly tucked so that your back is in a neutral position.
Wide second
This is my favorite barre position! With your feet wider than hip-width apart — your heels should be shoulder-width apart — focus on staying upright and not hinged as you would in a sumo squat.
Keep your feet wide apart with your toes turned out.
As you sink low, bend deeply at your knees, keeping your hips low to the ground — think about pressing your knees back to activate the outer glutes and thighs and make sure your knees are in line with your ankles.
Engage your core, keep your torso upright and back neutral. Shoulders stay stacked over your hips.
Fourth position
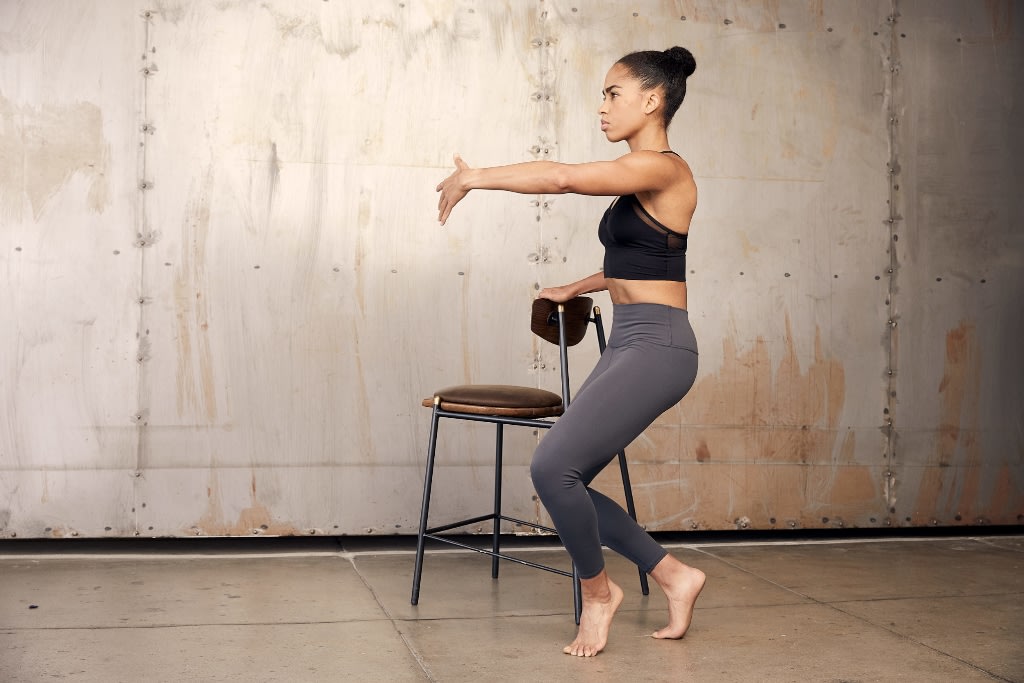
Fourth position forms the start of many other movements in Barre with Britany — so once you nail it, you’ll have a good foundation for the rest of the program.
From fourth, prepare for lots of pulses, holds and front-leg lifts on your tippy-toes. You will need a waist-high support to help with your balance.
Start in first position with your heels together and one hand holding on to your support.
Lift your heels and rise up to your tippy toes.
Step the outer foot (the foot furthest away from your support) forward one step, so that the big toe of your front froot is in line with the heel of your back foot, keeping space between the feet. Remember to maintain the “V” shape from first position, with both knees facing outwards, ensuring your feet remain splayed. This is a great way to build strength in the feet!
With your core engaged, bend the knees, keeping your torso upright, shoulders relaxed and over your hips, and back neutral. If this impacts your knees, bend your knees less.
The key in fourth is to keep your weight evenly distributed between your feet. Stay centered — don't lean too far back or forwards and remember to sink low, keep your chest proud, and core tight.

Basic moves for barre beginners
I know it can be overwhelming as a barre beginner doing your very first class, so I’ve broken down two of the most common exercises and how to get them right.
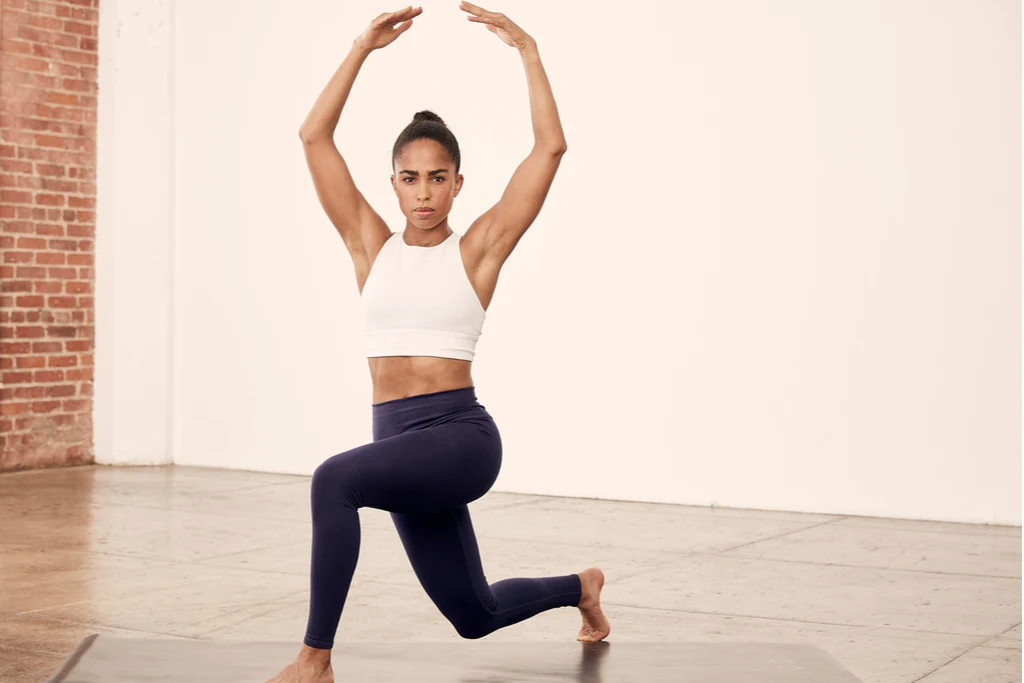
Curtsy lunge
The curtsy lunge is a bit different from a regular lunge — you’re working on the diagonal, so it’s a great movement for the outer thigh. It also targets the quadriceps and gluteus maximus like a traditional squat but focuses more on the gluteus medius and gluteus minimus than a traditional lunge.
Step your foot forward, with toes facing forward.
Take the other leg back on the diagonal, behind the front leg.
Keeping the heel of the back leg lifted press through the ball of the foot.
Bend both knees as you lower down.
Press down through your front leg and focus on engaging the glutes of the front leg as you stand up.
It’s okay to lean forward slightly, but your chest should always remain lifted and your gaze forward — bracing your core will help you maintain good form.
If you have any knee pain, slow the movement down and take your time. Here are my recommendations if you feel it in your knees:
Swap a curtsy lunge for a reverse lunge instead.
If the reverse lunge is still too much, static movement will be easier on your knees — this means staying in the position and moving up and down, instead of stepping back into the lunge and returning to the standing position.
And lastly, if these modifications are still contributing to knee pain, you can try limiting your range of motion — only move halfway down instead of to your lowest point.
Arabesque in parallel
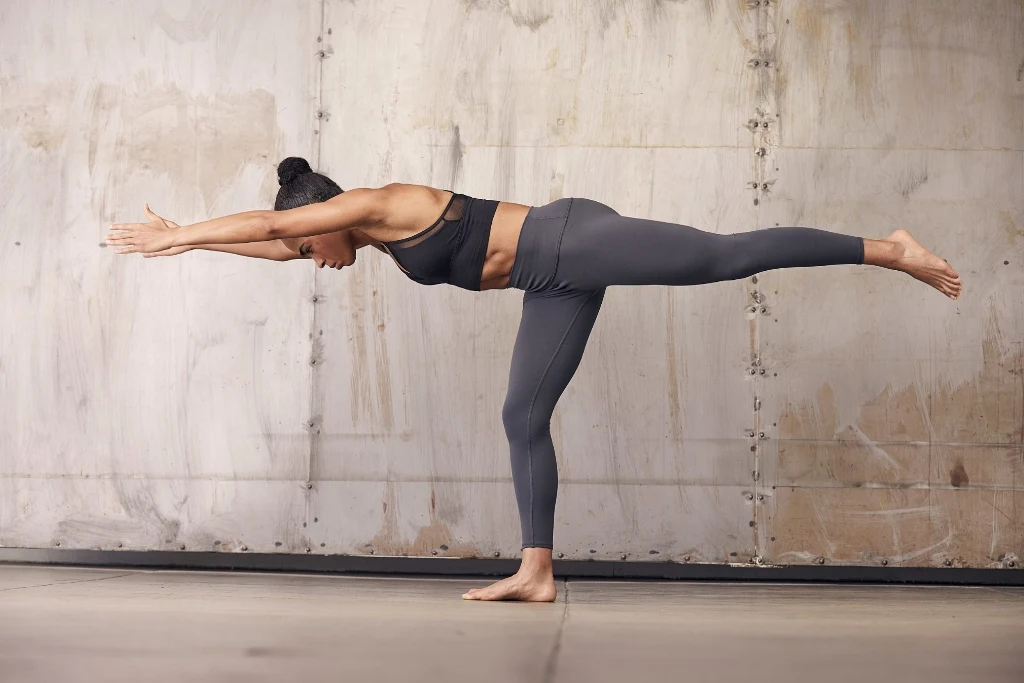
This traditional ballet position works the entire backside, making it a great exercise for your glutes! The arabesque is one of the most common movements you’ll find in my barre classes.
Face your support with your forearms folded on the highest part, and chest parallel to the floor.
Take a step back from the support, keeping your feet parallel.
Bend both knees slightly, keep your core tight, hips back, and extend your “working” leg.
Remember to keep a slight bend in the knee of your standing leg, while keeping the “working” leg straight with a pointed toe.
To add in pulses, lower your “working” leg down and back up again, in a small pulsing motion — squeeze your glutes with each leg raise, ensuring your hip does not open on one side. This will help you feel it more in your glutes!
Once you’ve perfected your technique, you can challenge yourself by removing the support and try a freestanding arabesque, with your arms straight out behind you next to your hips, or in front of you in prayer with palms pressed together — but if this is too much, keep your hand on the support and come to the tippy-toes of your standing leg.
How to maintain good form in your barre workout
In barre, proper form starts from the bottom up — getting your foot position and knee alignment perfect is key to nailing every movement and staying injury-free.
When flat-footed, always make sure your weight is evenly distributed across all planes of your foot, your knee aligned or behind your middle toes, and stacked over the ankle. It’s okay for your knees to pass over the toes when on your tippy-toes — just remember to press your weight evenly into all five toes, especially your big toe and the balls of your feet.
Here’s what to avoid:
Letting the knees track over your toes too far in positions like lunges.
Collapsing your knee inwards towards the big toe.
Overly arching your lower back.
Rounding forward through the shoulders.
Working too high up in the position — you want to keep as low as you can, without knee pain.
Lifting your big toe or little toe off the ground by not properly distributing weight across your foot.
What weights should you use for barre?
Don’t underestimate barre’s upper body movements. If you’re an avid gym-goer, or well-conditioned from at-home strength training you might have progressed to heavy weights in your shoulder press — but barre uses low weight dumbbells or hand weights, with high repetitions and minimal or no breaks.
If you’re a barre beginner, you want to use light dumbbells during your barre classes so that you can reach high reps and fatigue the muscles. Start with 2-3lbs (1-2kg) dumbbells and when you can complete the series with perfect form and without stopping, gradually increase the weight.
Household items such as soup cans, water bottles or shampoo bottles can be used in place of dumbbells, or — while weights can help to maximize physical change — you can complete your barre class with no equipment at all!
If you’re taking breaks often, starting without weights might be a good option until your strength increases.

Leg cramps? Here’s how to relieve them
After completing a few barre classes, you’ll notice your standing leg might cramp, especially in positions like the arabesque — and you’ll probably form a new appreciation for the flamingo and wonder why the “working” leg isn’t referring to both. In most movements, the “working” leg is the moving leg, but in a few barre exercises, the “working” leg is actually the standing leg.
Standing on one leg for a long period of time might be a new experience, but it is designed to help you stabilize your entire body. By forcing your “standing” leg to work together with your core, you’ll maximize your full body effort so you get stronger faster.
4 tips for temporary relief
“Standing” leg cramps will begin to diminish over time, after about 5-8 barre sessions — this is where your mind to body connection kicks in. In the interim, there are a few things you can do for temporary relief:
Wiggle your toes, bend/extend your knees or lift your heel
Take a quick break — stand up or shake your leg
Try to hold off taking regular breaks during each class
Avoid sinking into the hip and stay lifted and maintain proper form
Discover YOUR best self with barre
Don't let the thought of starting out as a fitness beginner deter you from achieving your health and fitness goals — the key is to focus on YOU and your workout.
When you feel confident in basic training principles you can set your own goals to work towards and feel empowered when you reach them.
Get ready to experience the mental challenge, physical benefits, and, most importantly, self-belief with barre. For more practical tips and helpful advice on all things barre, follow me on Instagram via @britanywilliams. You’ve got this!

I’m Britany, a NASM certified personal trainer, HIIT and barre instructor from Portland, Oregon. I became Sweat’s first Barre instructor in 2019 and have a range of fun and challenging barre, strength and pregnancy programs you can choose from.
* Disclaimer: This blog post is not intended to replace the advice of a medical professional. The above information should not be used to diagnose, treat, or prevent any disease or medical condition. Please consult your doctor before making any changes to your diet, sleep methods, daily activity, or fitness routine. Sweat assumes no responsibility for any personal injury or damage sustained by any recommendations, opinions, or advice given in this article.
Fitness